
lakedmb
Well-Known Member
This was posted originally by Soundhound, then CMonster helped us revive it, which is when I saved a copy. Hope that this can be useful to some people out there.
The Soundhound DIY Interconnect
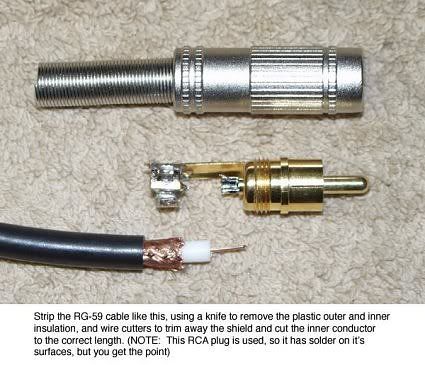
Here are detailed instructions for constructing the type of interconnect Soundhound uses in his studio. It can be used for anything from analog SACD connections and the like, up to S/PDIF coax connection from your DVD player to your preamp/processor. This interconnect is as good as any "boutique" brand you'll find.
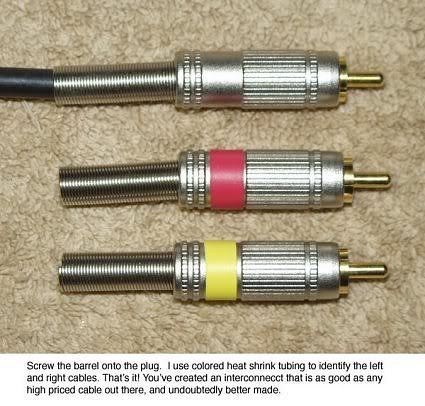
The RCAs can be had through the Canare web site, which is http://www.canare.com. The particular RCA is their model F-09. The RG-59 cable can be had at RadioShack, or probably through Canare (their wire is professional stuff, and very good).
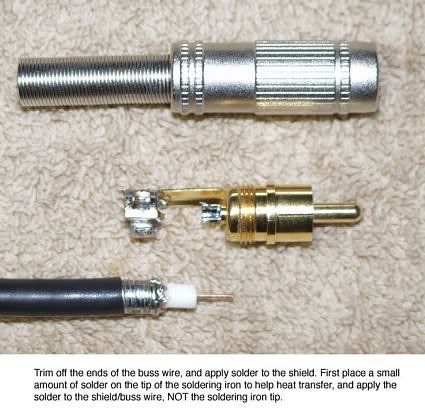
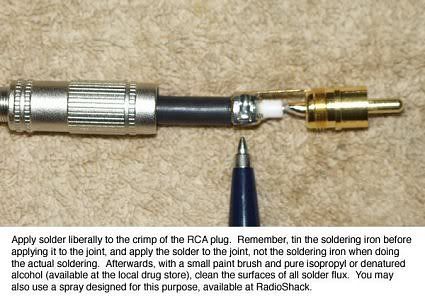
Purchase a good 30 watt "pencil type" soldering iron and 60/40 electronic solder at RadioShack or a similar outlet. They also will have books on basic soldering skills. Don't use a soldering gun, as they put out too much heat and will damage the cable. Have Fun!
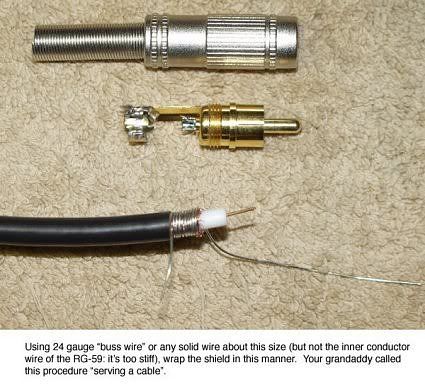


The reasons for the wrapped wire around the shield (serving the cable) are:
The Soundhound DIY Interconnect
Here are detailed instructions for constructing the type of interconnect Soundhound uses in his studio. It can be used for anything from analog SACD connections and the like, up to S/PDIF coax connection from your DVD player to your preamp/processor. This interconnect is as good as any "boutique" brand you'll find.
The RCAs can be had through the Canare web site, which is http://www.canare.com. The particular RCA is their model F-09. The RG-59 cable can be had at RadioShack, or probably through Canare (their wire is professional stuff, and very good).
Purchase a good 30 watt "pencil type" soldering iron and 60/40 electronic solder at RadioShack or a similar outlet. They also will have books on basic soldering skills. Don't use a soldering gun, as they put out too much heat and will damage the cable. Have Fun!
The reasons for the wrapped wire around the shield (serving the cable) are:
- It creates a better strain relief, better than simply crimping the tabs around the shield or outer cover which could deform the cable to some degree and possibly comprimise it's characteristics or puncutre the inner insulation, creating a short circuit.
- It promotes better and quicker solder flow to the shield of the cable (which wicks up solder applied to the outer buss wire), which creates a better solder fill and increases contact area with the shield, and to the tabs of the connector. It also avoids possible heat damage or shorts to the inner conductors while soldering, since the heat is distributed around the circumference of the shield better rather than being localized.
- It makes the shield area stronger so that when you crimp down on the tabs of the connector, the cable is not deformed (this is a real concern in RF work).
- It keeps the wires of the shield together when pulling "served" cables through conduits etc.
- It's actually easier to do than un-braiding the shield, and avoids the possible damage to the shield of doing so.
- It minimizes the possiblilty of stray shield wires contacting the other conductors inside the connector.
 bscene-birdiedoublered: