• Welcome to The Audio Annex! If you have any trouble logging in or signing up, please contact 'admin - at - theaudioannex.com'. Enjoy!
  • HTTPS (secure web browser connection) has been enabled - just add "https://" to the start of the URL in your address bar, e.g. "https://theaudioannex.com/forum/"
  • Congratulations! If you're seeing this notice, it means you're connected to the new server. Go ahead and post as usual, enjoy!
  • I've just upgraded the forum software to Xenforo 2.0. Please let me know if you have any problems with it. I'm still working on installing styles... coming soon.

Silk Purse out of a Pig's Ear? Flint's new coaxial speaker design

Flint

Prodigal Son
Superstar
I am in a position where I could benefit from selling stuff and since I own so much audio gear, I am looking into that.

Recently I worked on a project for a partner using some coaxial speakers and thought they were amazing, especially for the price. As it turned out, the first two speaker the supplier sent me were damaged in shipping and they immediately sent me a replacement set which arrived fine. When I asked about them, I was told to just keep the damaged speakers, which I did thinking I’d use them for photography for non-functioning trade show models. I discovered that I could repair them with some considerable effort and time, and I sat about doing that. It was quite difficult and took much longer than I anticipated, but in the end, I was able to restore them to working order.

I then had a set of working coaxial speakers which in a utility design sounded very good. I wondered how they could sound if I designed an over the top audiophile setup for them – so that’s what I did.

The finished system sounds stunning, and every bit as good as, and likely better than, the SVS MBS-01 speakers they are replacing.

Below is a bunch of photos of the design, build, and results for you to look over. Feel free to ask any questions you might have. Note that I cut costs at every point where I could because, after all, I need to cash from selling the SVS bookshelves to pay bills.

SBA_Build_EnclosureDrawing.png
Drawing of the design I decided to build. I wanted to use as much MDF as possible in place of more costly parts like flared ports or fancy input cups.


SBA_Build_PredictedBassResponse.png
My enclosure modelling software predicted a solid bass response with no ringing down to about 55Hz with a bass limit of about 43Hz.


SBA_Build_PredictedImpedanceResponse.png
The predicted impedance curve was pretty good for the driver and should be easy for the amp to drive.
 
I decided to replace the amps I was using with smaller, less costly models. I chose to go with small digital amps from Parts Express and an affordable DSP crossover. In total, I spent less than $200 to replace two mono amps for which I originally paid $250 each (or $500 for the pair).

230-320_HR_0.jpg
Mini DSP 2x4 digital speaker processor with two inputs and four outputs.


300-3810_HR_0.jpg
Dayton Audio 15 watt stereo amp for the tweeter (the coax tweeter is about 4 dB more sensitive than the mid/woofer portion, so the tweeter amp can be much smaller).

300-3803_HR_0.jpg
60 W digital amp for the woofers. It supports Bluetooth, but I will not be using that feature.
 
SBA_Build_20190513_141711.jpg
All the parts laid out for one enclosure with the parts for the second enclosure stacked next to them.

SBA_Build_20190513_184410.jpg
Dry fit of the folded vent for the bass loading. Note that I used concave rounded strips made from cheap PVC crown molding to soften the corners which vastly reduces resistance at the folds which means higher efficiency and less distortion.

SBA_Build_20190513_184422.jpg
Dry fit of the enclosure with the side removed to show most of what will be inside.
 
SBA_Build_20190513_184617.jpg
Dry fit of the whole enclosure from the front which will be glued onto the baffle. The extra holes on the front reduce weight, increase internal volume, reduce vibration, and break up reflections.

SBA_Build_20190514_150937.jpg
The two baffles after fully shaping. I use four short dowels to align the enclosures to the baffles. I didn't make the baffle double thick over the entire area to reduce weight. However, being double thick at the edges allows me to create a larger radius roundover and reduce edge diffraction even more. I also offset the drivers by prime number denominators to reduce the audibility of any edge diffraction which may still occur.

SBA_Build_20190514_163824.jpg
Final fitting before gluing the enclosure permanently.

SBA_Build_20190515_132305.jpg
First enclosure finished with the second drying in the clamps in the background. Note that instead of using very costly through MDF binding posts or fancy plastic input cups, I cut out a rectangle in the rear and glued some 1/8" plywood to the inside which I then drilled holes for affordable, though still very nice, binding posts. To ensure rigidity and reduce vibrations and losses I coated the outside with wood glue and the inside with rubber.
 
SBA_Build_20190516_124548.jpg
Once the baffles and enclosures were assembled, I sealed and sanded many times to get a smooth, surface all around which can easily be painted any color. This was the most time consuming part of the build, though the difficulty was low.

SBA_Build_20190517_205626.jpg
I then glued the baffles to the enclosures and painted with "Sun Yellow" enamel paint.

SBA_Build_20190518_101451.jpg
I wanted more than just a solid color on the front, so I masked off the rear portion and did some artsy work on the baffles.
 
SBA_Build_20190518_101803.jpg
I spot painted some orange and lighter yellow on the front, then draped yarn and twine over that before painting with the Sun Yellow again which made some stringy lines running vertically.

SBA_Build_20190518_115220.jpg
You can sorta see the pattern here. It doesn't photograph well, but it looks very nice in person. I then applied several coats of clear gloss enamel to ensure the paint job looks smooth and consistent.

SBA_Build_20190518_150150.jpg
Together in one photo - you cannot make out the pattern at all.


SBA_Build_20190519_170527.jpg

After a few days of drying, I took them inside and started assembling them.
 
SBA_Build_20190519_170750.jpg
I decided to use cheap Walmart purchased polyfill to stuff the enclosures to save on costs. It took a bit more than would be need if I used Acoustastuff or fiberglass, but it still costs less than half.

SBA_Build_20190519_171131.jpg
Getting ready to mount the speakers.

SBA_Build_20190520_084102.jpg
Since the tweeter can be delicate, I installed a capacitor inline with it which filters out the bass below 1,000Hz. Since the crossover point is going to be over 2,800Hz (ultimately I went with 3.100Hz), the passive filter is way out of the range of the active filter.
 
SBA_Build_20190515_172944.jpg
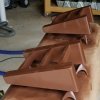
I never liked the metal stands I had the MBS01 speakers on, so I used the cutoff pieces from the angled tops of the "Rocketman" loudspeakers and made stands for the new speakers.

SBA_Build_20190517_110718.jpg
I sealed the MDF where it would be visible and painted the stands a dark brown which I thought looked good with the yellow and the brown wood stain of the console I was placing them on. I debated using Hunter Green and a dark Maroon, but I like how this turned out.
 
SBA_Build_20190521_172010.jpg
From the primary listening / watching seat. I think they look very nice.

SBA_Build_FrenquencyResponse_In-Room.png
Here are the measured in-room frequency response curves of the two speakers after tuning. The bass extension is both measureably and audibly very solid and low for a small 6" mid/woofer. I am very pleased. The right speaker has the solid right wall closer to it than the left speaker does, so a reflection is causing a dip at 150Hz. There is also a clear ripple in the midrange from about 600Hz to 2kHz which is caused by reflections off the top of the console the speakers are placed upon. The drop in the response at 13kHz is not audible as the angle of measurement greatly impacts the dips and peaks above 10kHz, a common issue of coaxial designs. It does not sound dull above 10kHz even though the mic position I used appears to have a massive drop above 10kHz.
 
In all, I didn't spend much money (I had the MDF in the shop and the paint, amps & crossover were the only cost, really). The results, from what I've auditioned so far, is amazing. They are clear, clean, tight, and smooth with loads of detail and lots more bass than I anticipated hearing. It is nice to know modern speaker drivers can sound so good at such low prices.

Good times.
 
By the way, saving money on ingredients doesn't really cut the real costs if one considered manhours. While using a scrap piece of 1/8" plywood saves me from buying $30 worth of high end binding posts that can go straight through MDF, mounting those expensive binding posts is as simple as drilling a hole for each one. I had to measure out, cut pilot holes on each corner, use a scroll saw to cut out the openings, rasp and sand smooth the edges, cut the plywood, glue it in place, wait for the glue to dry, coat the plywood so it doesn't resonate much, and then make a jig to align the drill bit for the binding post holes to use $10 worth of binding posts. I saved about $20 on the ingredients, but I put in well over two hours. What is one's time worth? If you want to earn $100K a year, your time is worth about $50 a hour. So, technically it costs $210 to make input terminals as I did versus about $50 for the other.

The same math could apply to the fancy folded shelf port I built into this enclosure versus spending $40 on two flared plastic tubes.
 
With this project I chose to use cheap digital amps, but very modern ones using the latest ICs from TI.

Over the past year I have built many speaker systems which were not meant to be truly audiophile quality and thus mating them to affordable and small digital amps was an easy choice. As I experienced these cheap little amps I came to realize they performed extremely well. So, I tried them on higher end speakers from commercial speakers I have around to even my state of the art "Statement" speakers which have the finest drivers available. In every situation, the cheap digital amps afforded themselves extremely well.

I am now of the opinion that when high output isn't necessary, the drivers have voice coils (and thus inductance which increases resistance at higher frequencies), and the amp is performing properly with low noise and low IMD, these new small digital amps are every bit as good as any decent Class-AB amp. Of course, when money is not an issue, I'd still choose a good class AB amp, if for no other reason than I know it performs well. But, if I am going to use an outboard line level crossover and need 6 channels of amplification for two three-way loudspeakers, I think decent digital amps will blow people away just as much as decent class-AB amps that typically costs 4x to 6x per watt.

Especially when using active crossovers, the benefits of going active and removing all the grunge, phase shift, ringing, delays in risetime and so on caused by passive crossovers vastly outweighs any minute benefit a Class-AB amp might still have over a digital amp.

Again, I still think a Class-AB amp is preferred - if all things are equal. But all things are not equal. I can get better suited small digital amps than small Class-AB amps for active speakers at 1/4th to 1/6th the price and the performance will still blow you away.

I am thinking I may shift my designs to using digital amps. I can get digital amp modules really affordably, too, so I may start assembling my own multichannel amp chassis using them.
 
I wish I had customers who felt the same way.
Have you tried using astonishingly excessive hyperbole in your marketing to obliterate any doubt about your world class talent to amass an astronomical amount of adoring customers to enable you to compete on a global scale so that you can hire Jeff Bezos to wash your car and Mark Zuckerberg to mow your lawn?
 
Thanks!!!

I wish I had customers who felt the same way.
Since I actually did pay you for my system you do have at least 1 official paying customer that agrees. Hell, I even brought steaks over. :)

I'm looking forward to hearing these drivers in the new configuration. I was lucky enough to hear them in your more industrial type designed system. I really dig how they look, perfect for your rooms decor.

Can't wait to get your impressions on these speakers.

Yes, you did buy my stuff, thanks! You are a good friend and customer and I still worry that I may have caused you more problems and solutions.

Now I need someone to buy the higher end systems.
 
How different do the drivers sound in this more ideal enclosure? It seems like a really cool way of looking at the impact of cabinet design, because the drivers are identical while the cabinets are so different.
 
Back
Top